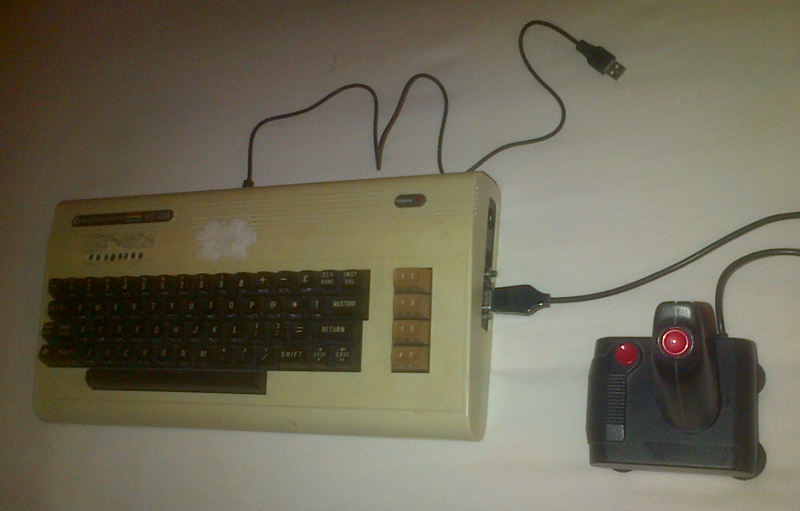
I converted my old Commodore VIC-20 into a personal computer keyboard using an Arduino Leonardo (clone).
» Why?
Because it looks cool. Don't cry over the wasted VIC-20, it was one with many dubious modifications and I kept all parts to undo this. The second reason is, it is yery useful when working with a VIC-20 emulator on the PC.
» Schematic
I used an Arduino Leonardo clone (from Olimex) to implement this. In the schematic this is CN1. Click here to learn more about the Arduino Platform.
To save I/O-pins the joystick is read with two analog inputs. Design and parts of the software are mostly taken from Spaceman Spiff's C64 USB keyboard (C64 USB keyboard).
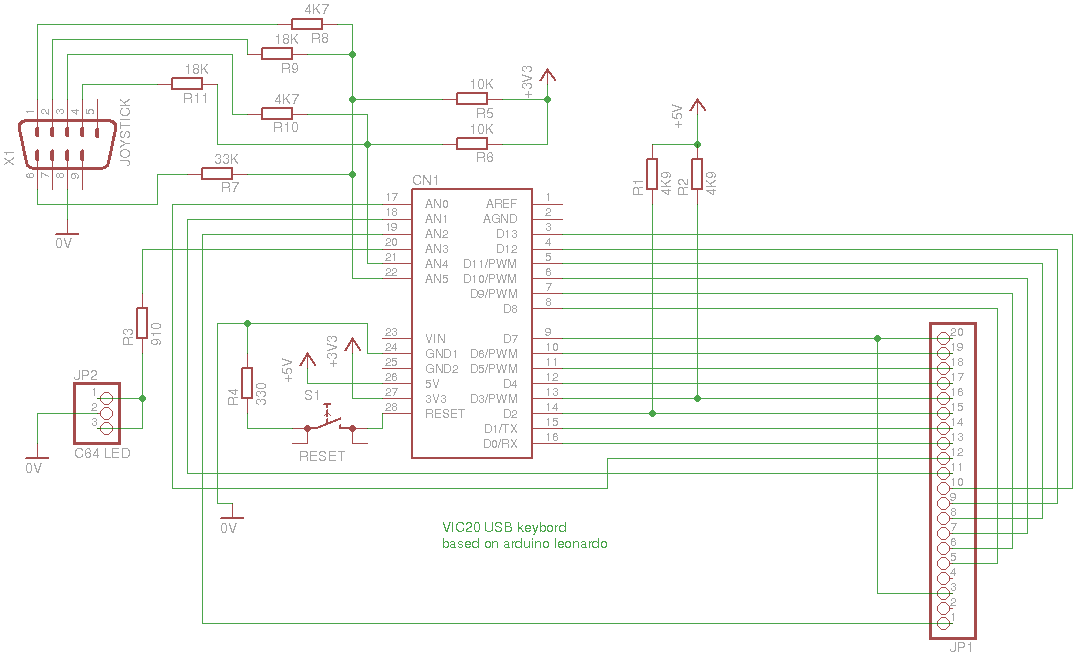
The following components are optional:
-
X1, R5, R6, R7, R8, R9, R10 and R11 if you don't use a joystick
-
S1 and R4 if you don't need a reset button (My VIC-20 allready had a button and it is useful for development purposes)
-
R3 if you don't need a power LED
-
R1 and R2 if your internal pullup resistors have low resistance (Mine had not, I'm using a leonardo clone from Olimex)
In fact, the minmal design is only the Arduino board and some pins to connect the VIC-20 keybord connector. I think this schematic works also with an old C64.
» Case Modifications
First, remove the mainboard of your VIC-20. Then mount your Arduino board so that the USB connector stays accessible through e.g. the hole for the floppy connector. Here is an inside view of my VIC-20:
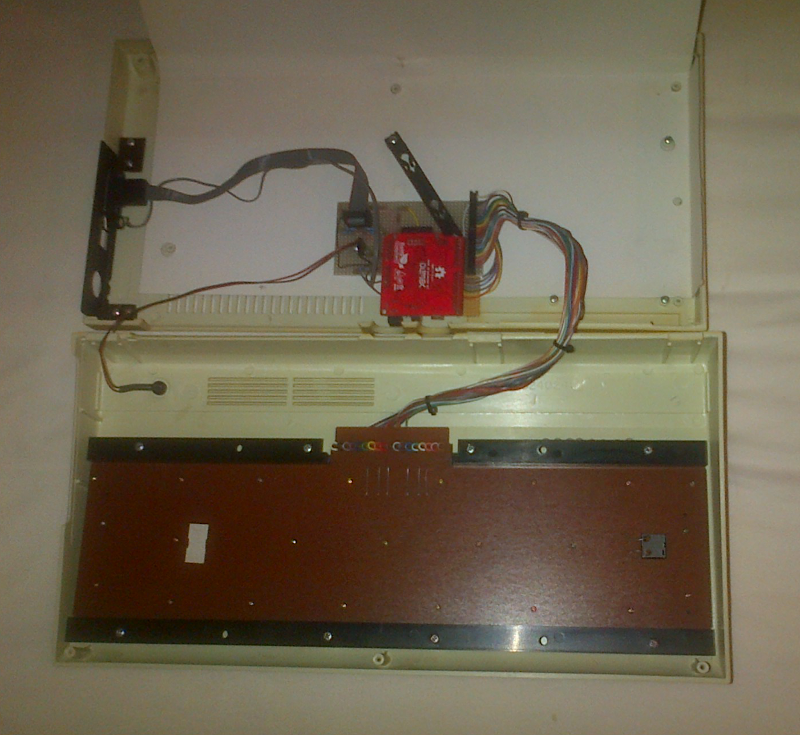
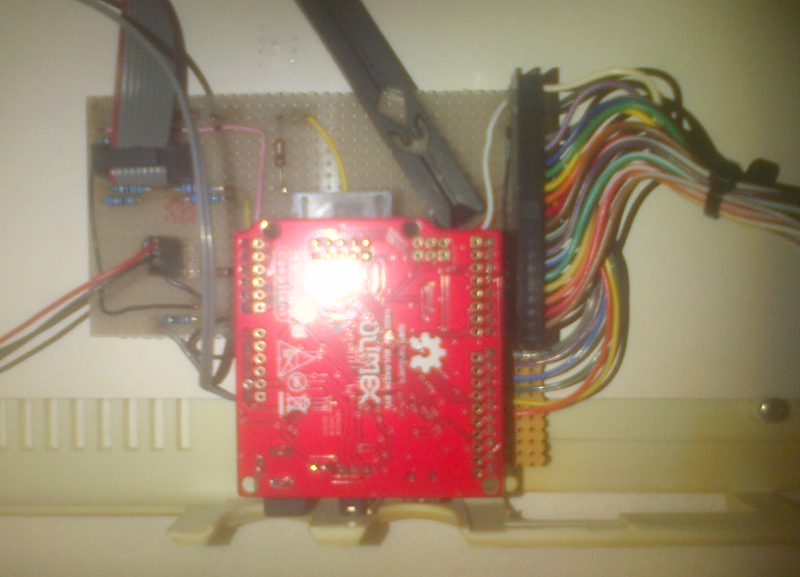
I used a perf-board to connect everything to the Arduino board. The cable with the joystick connector is taken from a RS232 connector of a personal computer. My VIC-20 had a reset button. I reused it for the Arduino board. This is useful when making modifications to the Arduino sketch. Here is a detail view of the perf-board:
» Software
You can download the Arduino sketch from here: Arduino sketch. Just download it to your Arduino board using the
Arduino IDE. After this, the VIC-20 power LED should light up (if everything is OK and you wired it to the board). With this software, the VIC-20 keyboard acts as a USB (HID) keyboard. The joystick is mapped to keyboard keys on the numeric pad. That means, it is not a real USB (HID) joystick.
» Keyboard and Joystick Mapping
To choose your language you have to uncomment one of the include lines in the source file vic20_kbd.ino before you download it to the arduino board:
/*********************************************************************
 * Keyboard Mappings                                                 *
 * Just uncomment one of them. dk and us are not tested              *
 *********************************************************************/

#include "key_de.h"
//#include "key_dk.h"
//#include "key_us.h"
I only tested the key_de.h-mapping and it is still not perfect, but does the job for most keys. The program xev will help you on GNU/Linux machines, if you want to optimize the mapping. If you are using VICE, you can use this vice keyboard mapping file (vkm), which is suitable for german keyboard layouts (and also still not perfect). It is zipped, because my webhoster doesn't like all file extensions. To check the joystick I wrote a small basic program:
10 dim js(2,2):poke37139,0:dd=37154:pa=37137:pb=37152
20 fori=0to2:forj=0to2:readjs(j,i):nextj,i
25 data-23,-22,-21,-1,0,1,21,22,23
30 gosub9000:printjs(x+1,y+1):printfr*99:goto30
9000 pokedd,127:s3=-((peek(pb)and128)=0):pokedd,255
9010 p=peek(pa):s1=-((pand8)=0):s2=((pand16)=0):s0=((pand4)=0)
9020 fr=-((pand32)=0):x=s2+s3:y=s0+s1:return
Just paste it into the VICE-window and type RUN. It writes different numbers on different joystick positions, if everything is ok. If you have problems with the joystick, try turning num-lock on and off.